WOD3: Person & Crowd Classes
We’ve looked at box cars and forests, now let’s build a crowd.
Rx: <20 min Av: 20-40 min Sd: 40-60 min DNF: 60+ min
Instructions
- Make a copy of your Picture project. If you haven’t been following along in class, download the Picture Project and import it into your workspace.
- Right-click your project and go to “Refactor > Rename” to name it
Picture_uLogin - Right-click on your Picture project and go to “New > Class” to create a
Personclass. - At minimum, your composite person shape should consiste of a
Circlehead field and aRectanglebody. (You may optionally create additional fields for arms, face, hat, etc.) - Create a Person constructor with 3 parameters:
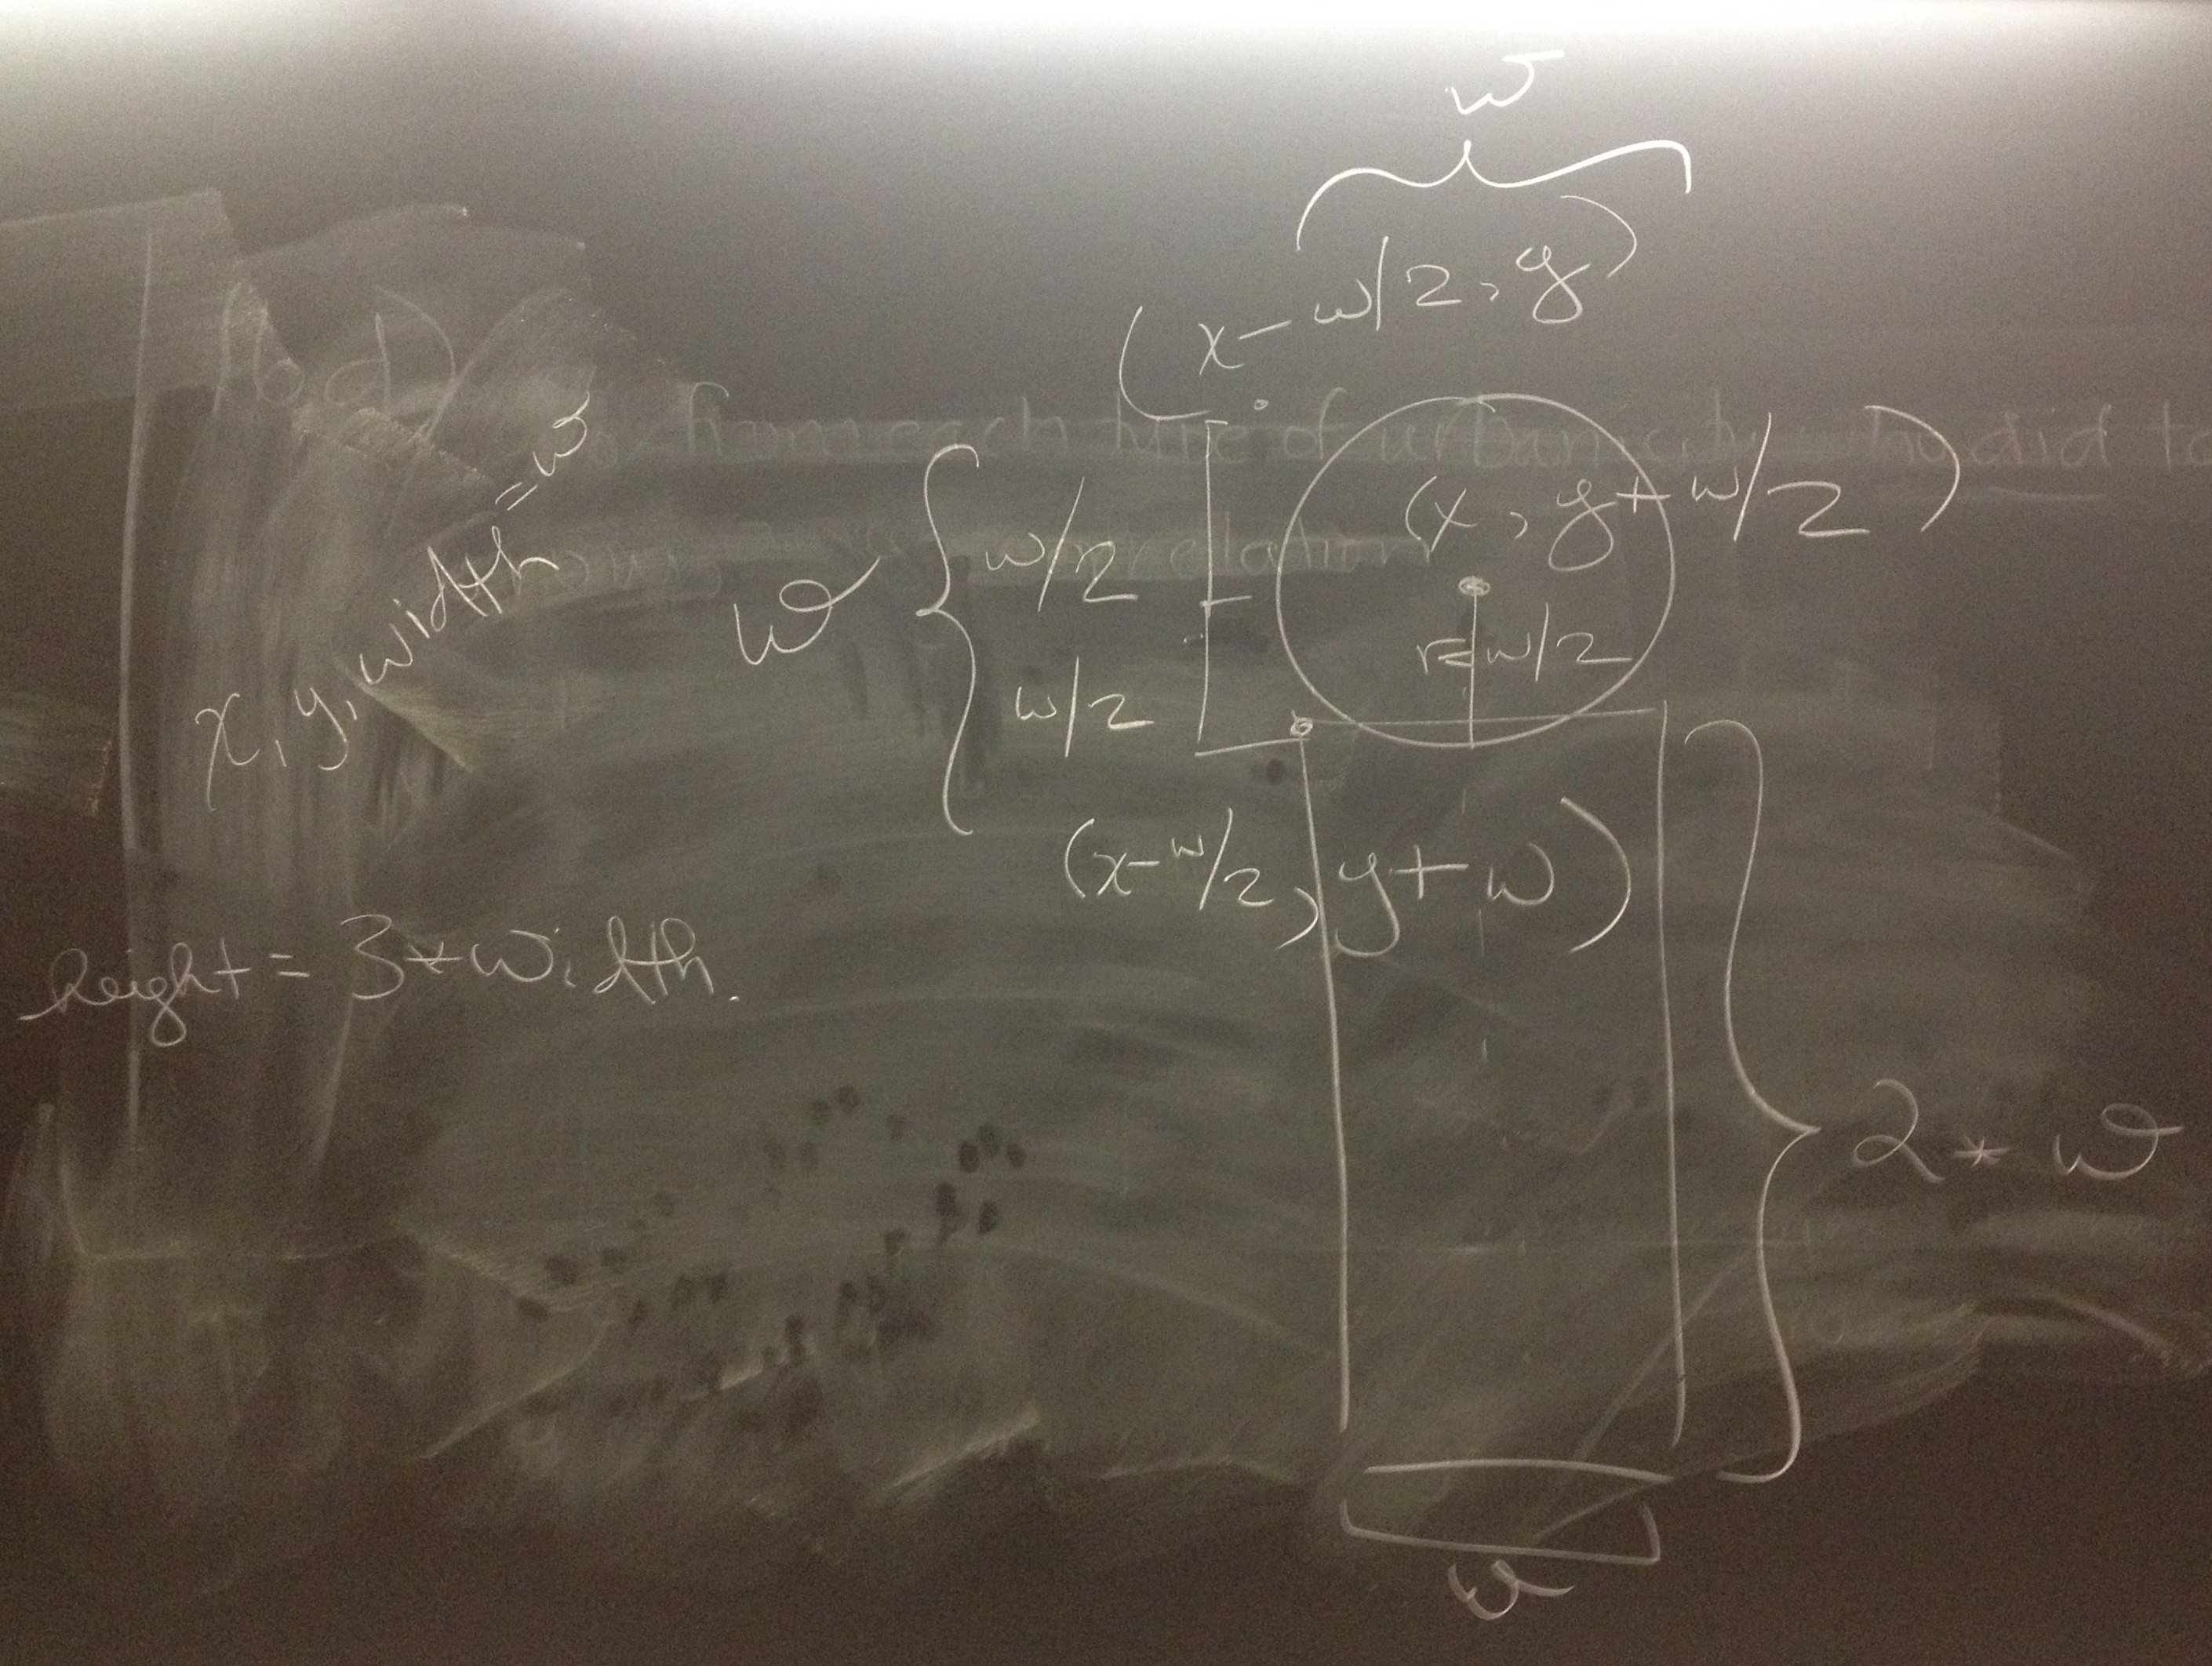
x,y, andwidth. - Create a Person constructor with 5 parameters:
x,y,width,headColorandbodyColor. - Create a
setBoundsmethod that:- Has 3 parameters:
x,y, &width - The person starts at
x - width / 2, yand extends towidth&height. Note that the x position is in the middle of the person. - The head is the full width.
- The body’s height is 2 times the width of the person & the full width.
- Has 3 parameters:
- Call your
setBoundsmethod from the constructor. - Create a
drawmethod that takes aGraphicsparameter and calls the draw methods of the 2 fields - Add getter & setter methods for
headColorandbodyColor. - Create a
Personin yourPictureclass to test your code. When satisfied, move on to create a crowd. - Create a
Crowdclass with:- At least 3
Personfields or a singleArrayList<Person>field. When drawn, the people should overlap a little bit. For example, you could put two people behind the front person by reducing their size by 75% and putting them a little to the left and right of the front & centered person:
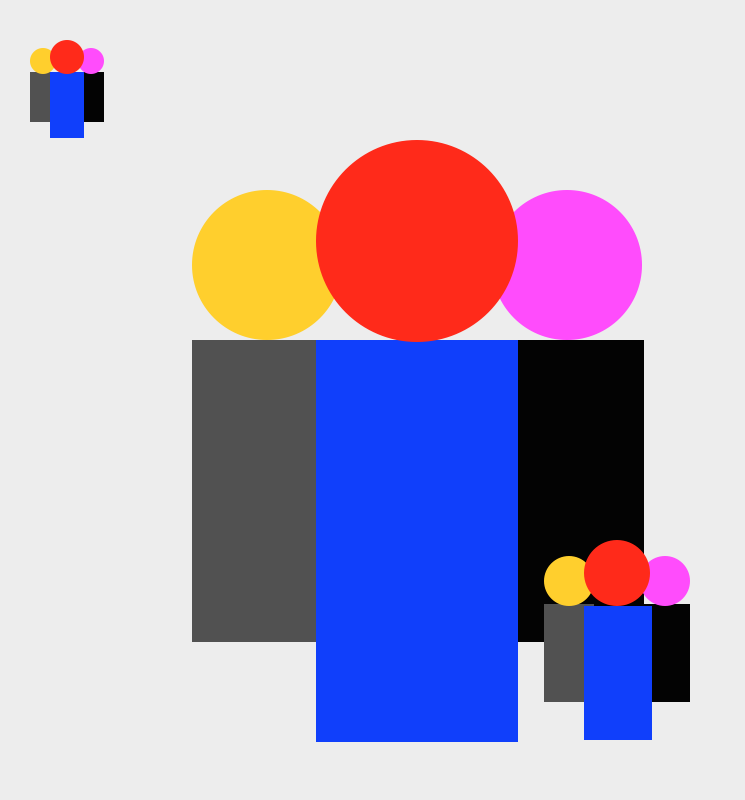
- A constructor with 3 parameters:
x,y,width. The width represents the overall width of the crowd, not an individual person. - A
drawmethod that has aGraphicsparameter and calls the corresponding draw methods for the people.
- At least 3
- Test your new
Crowdclass by replacing yourPersonfield(s) in the Picture class. - Add two more
Crowdfields to your Picture (for a total of 3). Modify the position & sizes in the Picture class so each crowd looks a little bit different. - Export your program by right-clicking on your project folder, and selecting “Export > General > Archive File”. Name the file “Crowd_uLogin.zip”.
- Upload your file to moodle to submit.
Person setBounds calculations